WSL2 + Docker Desktop + VSCode(Remote Development)でcreate-next-appを実行する(なおdevcontainer.jsonを自分で記述する)
この記事 is 何
Next.jsのチュートリアルを、折角なのでWSL2 + Docker Desktop + VSCode (Remote Development) でやってみた記録である。
前提環境
VSCoceの拡張機能 Remote Developmentのインストール
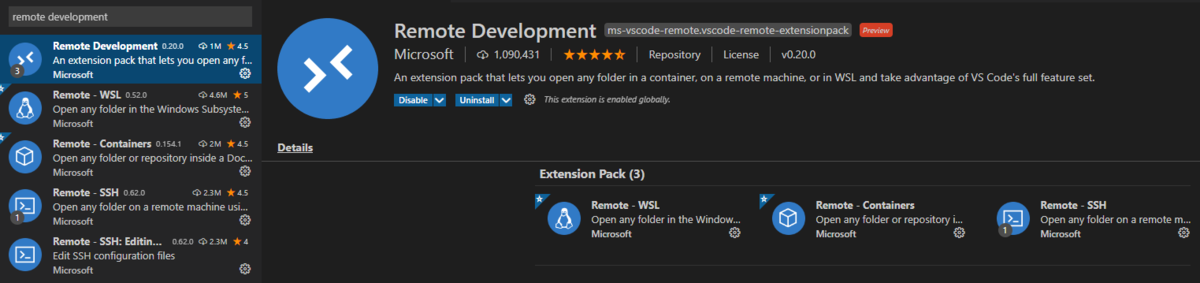
VSCodeの拡張機能に、Remote Developmentをインストールする。
これにより、Remote-WSL、Remote-Containers、Remote-SSHがセットでインストールされる。
WSL2上に作業フォルダを作成
$ cd /home/<ユーザ名>
$ mkdir workspace
$ cd workspace
$ mkdir nodesample
$ cd nodesample
$ pwd
/home/<ユーザ名>/workspace/nodesample
Remote Development で使用するコンテナ関連ファイルの作成
- 最終的なディレクトリ構成は以下となる
nodesample
└ .devcontainer
    ├ devcontainer.json
    └ Dockerfile
VSCodeからWSL2(Ubuntu)を起動
$ pwd
/home/<ユーザ名>/workspace/nodesample
$ code .
VSCodeが WSL2上のnodesampleディレクトリを開いた状態になる
※VSCodeの左下に「WSL Ubuntu」と表示されればOK

VSCodeのRemote - Containerを使ってコンテナ起動できる環境を作成する
.devcontainer/Dockerfile の作成
- DockerFile
FROM node:lts
とりあえずNode.jsが入ればいいのでこれだけ。
.devcontainer/devcontainer.json の作成
devcontainer.json
{
    // VSCodeに表示されるワークスペース名
    "name": "node-sample",

    // Docker buildを実行するディレクトリ。devcontainer.jsonファイルからの相対パスで設定
    "context": "..",

    // コンテナの内容を定義するDockerfileのパス。devcontainer.jsonファイルからの相対パスで設定
    "dockerFile": "DockerFile",

    // コンテナ側のVSCodeの設定値(setting.json)を変更したい場合、設定
    "settings": {
        "terminal.integrated.automationShell.linux": "/bin/bash",
    }
}
Remote-Containersでコンテナにリモート接続する
- VSCodeの左下の緑のボタンをクリックする
- コマンドパレットから、「Remote-Containers: Reopen in Container」を選択する
- コンテナの生成が始まるので待つ
- 下記ような画面が表示されればOK。コンテナが起動し接続されている

※左下の緑ボタンに「Dev Container」と表示される
create-next-appを実行してみる
$ npx create-next-app nextjs-blog --use-npm --example "https://github.com/vercel/next-learn-starter/tree/master/learn-starter"

npx: installed 1 in 1.106s
Creating a new Next.js app in /workspaces/nodesample/nextjs-blog.

Downloading files from repo https://github.com/vercel/next-learn-starter/tree/master/learn-starter. This might take a moment.

Installing packages. This might take a couple of minutes.


> sharp@0.26.2 install /workspaces/nodesample/nextjs-blog/node_modules/sharp
> (node install/libvips && node install/dll-copy && prebuild-install) || (node-gyp rebuild && node install/dll-copy)

info sharp Downloading https://github.com/lovell/sharp-libvips/releases/download/v8.10.0/libvips-8.10.0-linux-x64.tar.br

> @ampproject/toolbox-optimizer@2.7.0-alpha.1 postinstall /workspaces/nodesample/nextjs-blog/node_modules/@ampproject/toolbox-optimizer
> node lib/warmup.js

AMP OPTIMIZER Downloaded latest AMP runtime data.
added 642 packages from 422 contributors and audited 644 packages in 25.347s

30 packages are looking for funding
  run `npm fund` for details

found 2 low severity vulnerabilities
  run `npm audit fix` to fix them, or `npm audit` for details

Success! Created nextjs-blog at /workspaces/nodesample/nextjs-blog
Inside that directory, you can run several commands:

  npm run dev
    Starts the development server.

  npm run build
    Builds the app for production.

  npm start
    Runs the built app in production mode.

We suggest that you begin by typing:

  cd nextjs-blog
  npm run dev
サーバをRunする
$ cd nextjs-blog
$ npm run dev

> learn-starter@0.1.0 dev /workspaces/nodesample/nextjs-blog
> next dev

ready - started server on http://localhost:3000
event - compiled successfully
Attention: Next.js now collects completely anonymous telemetry regarding usage.
This information is used to shape Next.js' roadmap and prioritize features.
You can learn more, including how to opt-out if you'd not like to participate in this anonymous program, by visiting the following URL:
https://nextjs.org/telemetry

event - build page: /
wait  - compiling...
event - compiled successfully
ブラウザで動作確認
下記が表示されればOK。

以上。